Pages

Wednesday, March 28, 2012

Mexican Stuffed Shells

Mexican! Mexican! Mexican! We love Mexican...and pasta! so why not combine the two!? I was a little concerned when I read the ingredients and saw cream cheese on the list but my husbands reaction was like none other. Let's just say he asked if we could have it every week! haha

Ingredients:
1 lb. ground beef
1 package low-sodium taco seasoning
4 oz. cream cheese
14-16 jumbo pasta shells
1.5 cup salsa
1 cup taco sauce
1 cup cheddar cheese
1 cup monterey jack cheese
3 green onions
Sour cream

Directions:
1. Preheat oven to 350°.
2. In a frying pan cook ground beef; add taco seasoning and prepare according to package directions.
3. Add cream cheese, cover and simmer until cheese is melted. Blend well. Set aside and cool completely.
4. While ground beef is cooking, cook the pasta shells according to directions; drain. Set shells out individually on cutting board/baking sheet so that they don’t stick together.
5. Pour salsa on bottom of 9×13 baking dish. Stuff each shell with the meat mixture. Place shells
in 9×13 pan open side up. Cover shells with taco sauce. Cover with foil and bake for 30 minutes.
6. After 30 minutes, add shredded cheese and bake for 10-15 more minutes, with the foil removed.
7. Top with any condiments you’d like (green onions, black olives, etc.)
8. Serve with sour cream and/or more salsa.


Adapted from: The Way To His Heart

Yummy Water To Help Boost weight loss? Okay!

4/2/2012 UPDATE: TOTALLY WORKS!!! Ever since I gave birth to my now 3 1/2 month old son I try on a pair of jeans every week at least once that I wore before I was pregnant . It first started out that I couldn't get my thighs in them. Then it turned into not being able to get them button. And for a long time that was the case. Last week is when I tried this water. Today the jeans fit! I really think the water helped..well and eating right and exercising!!

For the love of paint

We have a ton of canvas' laying around. Michaels usually has them on sale in bulk so I always stock up. Aubrey wanted to paint so we got some masking tape and taped her name on the canvas

She then went wild.

Once it was dry, we took the tape off and wahlah!

Adapted From: Attack of the Twins

Tuesday, March 27, 2012

Ranch House Crock Pot Pork Chops

Now, I'm not a pork lover. Actually, this was my very first time buying or making pork so I was a little nervous. But we had my mom over for dinner tonight and I knew she loved pork and I wanted to try this recipe. It was awesome!

Ingredients:
6 pork chops, 1/2 inch thick
1 packet dry Ranch Dressing Seasoning
10 oz can Cream of Chicken Soup
4 lbs peeled, cubed potatoes
5 Tablespoons real butter
1 cup fresh grated Parmesan cheese
6 cloves roasted garlic (directions are below)
1- 1 1/2 Cups warm milk
1 Tablespoon salt, or to taste
1 teaspoon fresh cracked black pepper, or to taste

Directions:
1. Place pork chops, Ranch seasoning and soup into a medium sized crock pot over high heat for 4 hours or low heat for 6 hours.
2. Place potatoes into a large pot of cold water. Place onto stove top over high heat and bring to a boil. 3. Once water is boiling, cook for 10-12 minutes or until potatoes are fork tender. Drain and transfer to the bowl to smash then add butter, Parmesan, garlic, milk, salt and pepper. Season to taste if needed. For thinner mashed potatoes add more milk, slowly until your desired consistency.
4. Scoop mashed potatoes onto serving plates and top with pork chops and soup gravy from crock pot. You can add little parsley on top to serve, but I forgot to grab some at the grocery store!

Roasted Garlic Directions:
1. Preheat oven to 350 degrees F. Place bulb of garlic with skins on, wrap lightly in tin foil and bake for 1 hour.
2. Remove from foil and let cool for 15 minutes.
3. Remove garlic from skins, place in a bowl and mash with a fork until completely mashed. Set aside. One garlic bulb will have around 12 cloves.


Adapted From:Real Mom Kitchen

Chicken and Cheese Lasagna Roll-up

Ah, yes!!! a new kind of Lasagna! Chicken is my favorite. and the whole family loved it!

Ingredients
3 cups chopped cooked chicken
1/4 cup milk
 1 cup Ricotta cheese
 1/8 teaspoon white pepper
1/4 cup crumbled feta cheese
8 lasagna noodles, cooked and drained
 1/4 cup grated Parmesan cheese
2 cups Prego Spaghetti Sauce

Directions:
1. In medium bowl, combine chicken, cheeses, milk, and pepper
2. Spread 1/2 cup mixture on each lasagna noodle; roll jelly-roll fashion
3. In a 13 by 9-inch baking dish, spread 1 cup spaghetti sauce
4. Arrange lasagna rolls, seam-side down in sauce in baking dish
5. Top with remaining spaghetti sauce
6 . Cover
7. Bake at 375 degrees F for 30 minutes or until hot
8. Serve, if desired, with additional Parmesan cheese.


Adapted From: iVillage

Wednesday, March 21, 2012

Paula Dean Oven Roasted Potatoes

I love all kinds of potatoes so I'm always looking to try new ones. And I LOVED these! So good.

Ingredients
1 1/2 lb small new red potatoes (about 15), scrubbed and dried
1/4 cup olive oil
4-6 cloves garlic, crushed
1 tablespoon fresh or 1 teaspoon dried rosemary
kosher salt
pepper

Directions:
1. Pare a narrow strip of peel from the middle of each potato.
2. In a large bowl mix the oil, garlic, and rosemary; add the potatoes and toss well.
3. Then season vegetables with kosher salt and pepper.
4. Transfer the potatoes to a shallow baking pan and roast at 350 degrees until potatoes are tender when tested with the tip of a knife. Serve hot. These can also be chilled and served with fried chicken or ham.

Adapted From: Paula Deen

Monday, March 19, 2012

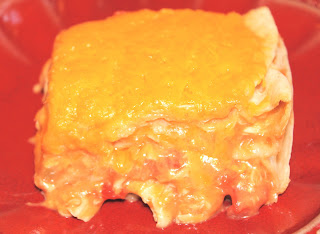
Paula Dean Mexican Chicken Casserole

Our family is a sucker for anything mexican. So every week we have some type of mexican food. Now we all know that Paula Dean is a genius and if she says it's good, you better believe her and try it out yourself! So I did!

Ingredients

1 10 3/4 -ounce can cream of chicken soup
1 10 3/4 -ounce can cheddar cheese soup
1 10 3/4 -ounce can cream of mushroom soup
1 10-ounce can tomatoes
1 whole chicken, cooked, boned, and chopped or 4 cups leftover cooked chicken
11 1/2-ounce package flour tortillas
2 cup shredded cheddar cheese

*The ingredients above are the real deal Paula Dean Mexican Chicken Casserole. I did a few things different keeping my husband in mind who is a rather picky eater. I left out the cream of mushroom soup and added a little salsa instead to add a little more flavor. In between each layer I also put cheese on it because my dear husband loves all things extra cheesy!
Directions:
1. Preheat oven to 350 degrees.
2. In a large bowl, stir together the three kinds of soup and the tomatoes. Stir in the chicken.
3. In a greased 13 x 9- inch pan, layer the tortillas and the chicken mixture, beginning and ending with tortillas. Sprinkle the cheese over the casserole and bake for 30 minutes.

Adapted From: Paula Deen

Sunday, March 18, 2012

Pear Salad with Walnuts and Feta

We needed to try something new. We always have the same old boring chef salad or my favorite, Spinach Strawberry Salad with Candied Pecans. I knew I would like this new one. It was my husband I had to convince...

Pear Salad with Walnuts and Feta Recipe

Ingredients
1 bag spring mix salad
2 pears, cored and thinly sliced
1/4 cup roasted walnuts
1/2 cup crumbled feta cheese
2 tablespoons balsamic vinegar or balsamic vinaigrette
3 tablespoons olive oil
freshly cracked pepper

*The pears in the picture I sliced with a cheese grater. 
Then after I took the picture I cut them again only because my husband doesn't really eat pears.
Directions
1. Preheat oven to 350 degrees. Spread walnuts on single layer in a baking sheet. Roast for 10 – 12 minutes, or until just fragrant. Be careful not to burn them.

2. Add spring mix to a large bowl. Top with thinly sliced pears, feta cheese and walnuts. Drizzle with balsamic vinegar and olive oil. Add freshly cracked black pepper to taste. Toss salad to incorporate all ingredients.

* Don't be afraid to add more Balsamic Vinegar/vinaigrette. We did so it wouldn't taste as dry and give it more flavor.

So good! Even my husband said so...that says a lot!

Adapted From: The Family Kitchen

Saturday, March 17, 2012

For the love of crayons

Like mother, like daughter, A loves coloring. So we have an insane amount of crayons laying around in this house. We needed to get rid of some of them. I came across a project on pinterest that I thought would be fun for us to do together. I'm sure most of you have all seen it. Melting crayons on canvas!


We hot glued the crayons onto the canvas. 

Prop the canvas up either on a tilt or straight up depending on how fast you want the crayon to "slide" down. Take a blow dryer and set it on low (unless you have a diffuser for it like I do, you can do it on high) to melt the crayons.

Once it's done it will look a little something like this!

Have fun with it! I've seen some really creative ones!

Adapted From: Tip Junkie

For the love of Bumble Bees

So last halloween, my daughter wanted to be a Bumble Bee. We looked around and I didnt see any costumes that didnt look cheap or cheesy. So I decided to make it. We already had a yellow tutu. We bought the antennas, stinger, and black shirt from target. I went to Jo Ann Fabrics for some yellow fabric. Cut them into stripes and sewed them (by hand again) on the black shirt. Front and Back. That only took me 14 hours...literally. My mom found a black tutu at Babies R' Us and I just layered that over the yellow tutu. Every Halloween store we went to was sold out of bee wings! Apparently that was the costume of the season. So once again we took a trip back to Target and found some fairy/butterfly wings in the baby section. I bought some yellow spray paint and turned them yellow. Now they don't look exactly like bee wings but they worked.

She loved her costume! She still wears it around the house with all of her dress up clothes!

For the love of leg warmers.

Okay, so as I lay in bed last night trying to fall asleep because I knew my son would be waking up for his feeding in an hour or two, I couldn't help but think to myself "Why would I do this blog on just cooking?" We do a lot of crafts in this house and DIY projects that people want to see how I did them so we might as well do it all on this page!

Today's St. Patricks Day. My kids had their outfits all ready to go. I put on my sons onesie and realized I didn't have any cute pants for him to wear. I've been trying so hard to find websites where they have cute boy leg warmers but the prices are either too expensive or you have to buy the onesie with it. I don't want the onesie, I only like the leg warmers..JUST GIVE ME THOSE!!! So I went in my daughters closet and look a pair of her old leggings and cut the legs off of them..
I sewed (by hand since I dont have a sewing machine) each end of the leggings. The white ones are a little small but they work for now...
They certainly aren't perfect. I'll be the first to admit I'm not the greatest at sewing. But they get the job done and practice makes perfect! I still have to sew the argyle ones!

Friday, March 16, 2012

Dark Chocolate Jack Daniels Cupcakes

These cupcakes were made today for his birthday "get together"..If that's what you'd like to call it?
His favorite hard liquor is Jack Daniels so of course I thought this would be perfect as well! He's so easy to please! haha

Now, keep in mind these were for my father-in-laws birthday so the garnash is a dark chocolate 50. You can garnash it however you'd like!

Chocolate J.D. Cupcakes
2 Cups (10 ounces) all purpose flour
3/4 cup (3.75 ounces) coco powder
2 cups (14.5 ounces) granulated sugar
2 tsp. baking soda
1 tsp. baking powder
1 tsp. kosher salt
2 eggs
1/2 cup super strong coffee
1/2 cup Jack Daniels Whiskey
1 cup buttermilk
1/2 cup vegetable oil
Directions:
1. Preheat oven to 350 degrees F.
2. In a large bowl, stir the flour, cocoa powder, sugar, baking soda, baking powder, and salt.
3. In separate bowl (I use a 4 or 8 cup measuring vessel) combine the eggs, coffee, whiskey, buttermilk and oil.
4. Pour the egg mixture into the flour mixture and whisk until smooth.
5. Spoon the mixture into prepared cupcake cups. I only fill half full and they come right up to the top.
6. Bake in preheated oven about 18-20 minutes until the tops spring back when lightly pressed.
Cool completely.

Dark Chocolate Whiskey Ganache
16 ounces good quality dark chocolate,chopped into small pieces 1/4 inch or less.
3/4 cup heavy cream
2 Tbsp. unsalted butter, softened
1/4 cup Jack Daniels Whiskey
Directions:
1. Place the chocolate in a heat proof bowl and set aside.
2. Heat heavy cream until just boiling. Pour over chocolate.
3. Cover chocolate and cream for 2 minutes to allow chocolate to soften. Uncover and stir with whisk until smooth and silky.
4. Stir in butter until fully incorporated.
5. Stir in whiskey until fully incorporated, cool completely.

Dark Chocolate Whiskey Buttercream
1 lb. unsalted butter, softened
1- 3 ounce package white chocolate, vanilla or cheesecake instant pudding mix
2 cups Dark Chocolate Whiskey ganache
1/2 cup sifted dark cocoa powder
1/2 cup heavy cream
1/2 cup powdered sugar
more whiskey to taste
Directions:
1. In stand mixer beat the butter and pudding mix together on medium high speed for 5 minutes or so.
2. Turn off, add the ganache, cocoa powder and heavy cream. Beat for another 5 minutes.
3. Add powdered sugar a little bit at a time, tasting as you go until it is sweet enough for you then beat on medium high for at least 5 more minutes.
5. If it isn't a strong enough whiskey taste for you add Tablespoon by Tablespoon of whiskey until it is to your liking.

Adatped From: Fields of Cake

Blue Moon Cupcakes

If you read my first entry I talked about my father-in-law. Well this may be weird but these next two entries on cupcakes have to do with him again. haha.

Last weekend we went to the in-laws for dinner to celebrate his 50th birthday. We had no idea what to get him so I just decided to make him cupcakes. Seriously, who doesn't love cupcakes!? And his favorite beer is Blue Moon. So I stumbled across a recipe for Blue Moon Cupcakes on Pinterest. Yes, I'm one of those girls who has an obsession with Pinterest. That's where my inspiration comes from when it comes to baking cupcakes.

So let's begin!
Now before I list the recipe. I want you to know this picture is not mine. It's from the missmake blog. The only thing I did differently with these cupcakes was the presentation. Instead of the little slice of orange, I used Orange Zest.

Blue Moon Cupcakes
3/4 c unsalted butter, softened
1 3/4 c sugar
2 1/2 c flour
2 1/2 tsp baking powder
1/2 tsp salt
3 eggs, room temperature
1 tsp vanilla
2 drops red food coloring
10 drops yellow food coloring
1/2 tsp orange zest
1 c Blue Moon beer
1/4 c milk

Directions:
1. Line 24 cupcake trays with liners. In a medium bowl, mix together flour, baking power and salt.
2. In a large bowl beat butter on medium speed for 30 seconds. Add sugar a little bit at a time, beating well. Once it's all added beat for 2 more minutes.
3. Add eggs, beating after each.
4. Add vanilla, food coloring and orange zest and beat.
5. Mix beer and milk in a measuring cup. Alternatively add beer / milk mixture and flour mixture to butter mixture in the large bowl, beating after each. End on the flour mixture.
6. Fill cupcake liners 2/3 full. Bake for 18 minutes at 375 degrees F until cupcakes are golden and a toothpick inserted in center comes out clean.
7. Once cool, frost each cupcake with a generous amount of frosting. Just before serving, garnish each with a small orange slice or some orange zest. (I really reccommend frosting them right before serving. Otherwise the frosting won't really mimmick the foam at the top of your beer and it will start to crystalize again...I don't know the correct term for that so I use crystalize haha)


Frothy White Frosting
2 egg whites, room temperature
1 tsp vanilla extract
1 tbsp orange juice
1 c sugar
1/4 tsp cream of tartar
                                                                1/3 c water

Directions:
1. In a saucepan, mix sugar, water and cream of tartar. Cook on medium heat until sugar is dissolved and mixture is bubbly.
2. In a large bowl, beat egg whites, vanilla and orange juice until soft peaks form. Slowly add hot sugar mixture, beating continuously. Beat for 7 minutes until stiff peaks form.

Adapted From: Miss Make

For the love of cooking

I used to hate anything that had to do with cooking or baking. I remember one time in high school an old friend and I were making brownies and once they were done we tried one. We named it the inside out brownie because we switched the amount of some of the ingrediants and they didn't taste right. Everytime I would make something I'd either burn it, forget an ingrediant, add too much of the ingrediant, or not read the directions close enough and do the steps wrong. After all of the frustration, I gave up. I stopped wanting to bake or cook. When my husband and I moved out on our own, our dinners consisted of anything in the frozen department at the grocery store. All I wanted to do was stick it in the oven and be done with it. Okay, so here and there I'd try some things from scratch just so my cook books didn't collect too much dust. :-)

As time went by I'd start experimenting more and more. I think it was to prove to my husband and father-in-law that I could cook without burning the house down or at least making the smoke detector go off. I say that because when we first bought our house my father-in-law made a comment about me cooking and it sort of upset me. Now if you know my father-in-law, he's an awesome guy and all about joking with me. I knew not to take it to heart. So when I say it upset me, it's only because I let myself give up when I wasn't "succeeding".

In October of 2011, I stopped working while I was pregnant with our second so I had a lot of time on my hands. That sounds silly. Anyone who is a mom knows parenting is a full-time job. I'll be cleaning up food my daughter threw on the floor, tidying up the house, cooking, potty training, cleaning the carpet from accidents, and getting crayon off the wall all at the same time. Anyways, since I had more time to cook, I started to enjoy it more.

Now, we usually never have the same meal in a month..except pizza. My husband and daughter love pizza. And it gives me one night off in the kitchen. When it comes to baking. I will find any reason to make cupcakes.

I started this blog because I wanted to have a way of keeping track of the dinners/desserts I make. I've had a few friends ask for some of the recipes and instead of typing them out every time someone asks, I figured why not have a blog that my friends and family can see what I've made lately but also as a public recipe book for those of you interested in trying them out yourself.

So here it goes!